Jump to content


- - - - -

Bedfords LC 2 Door rebuild/chev conversion


  • Please log in to reply
27 replies to this topic

#1 _Bedford_

_Bedford_
  • Guests

Posted 13 June 2007 - 04:24 PM

The Beginning

Hey guys, here's a thread about my LC rebuild.

I decided to build a tidy car with a nice noisy engine

So... off to EBAY to buy a shell/roller/complete car.

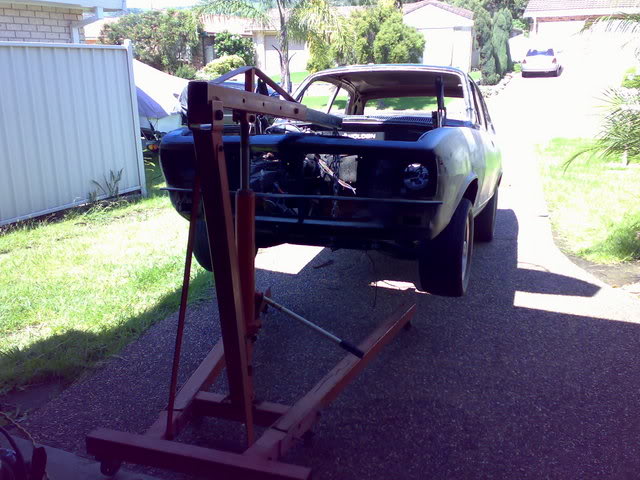
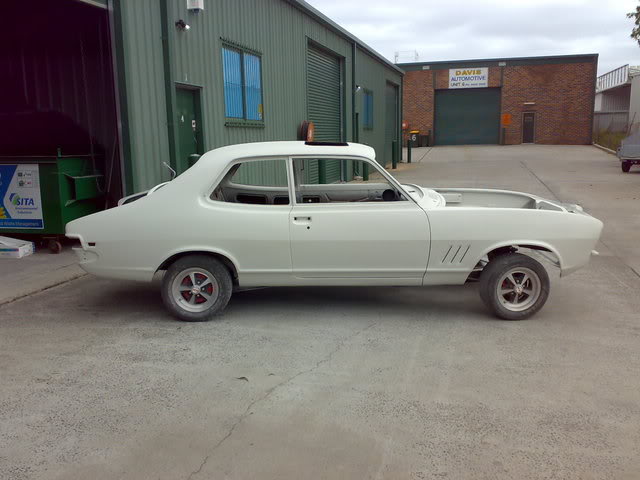
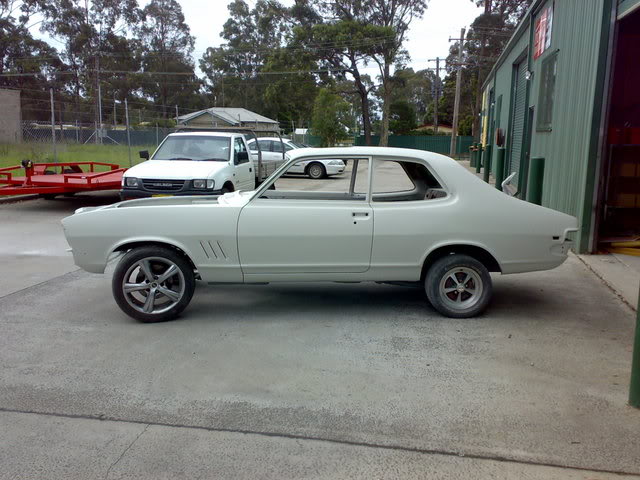
Ended up buying this beast - not too pretty to look at, hehe
Posted Image

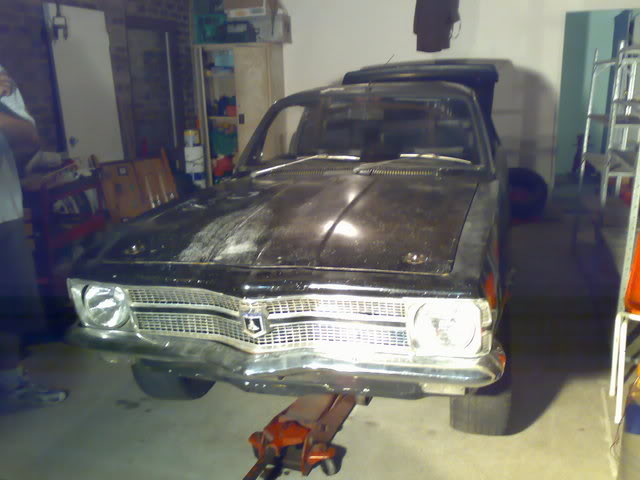
She's rough, and needs some work, but it's a good starting point... It's complete, and almost runs. Has her fair share of rust, but it's all repairable, and these cars are getting rarer. Also, you can't get much of an LC 2 door for what I was paying

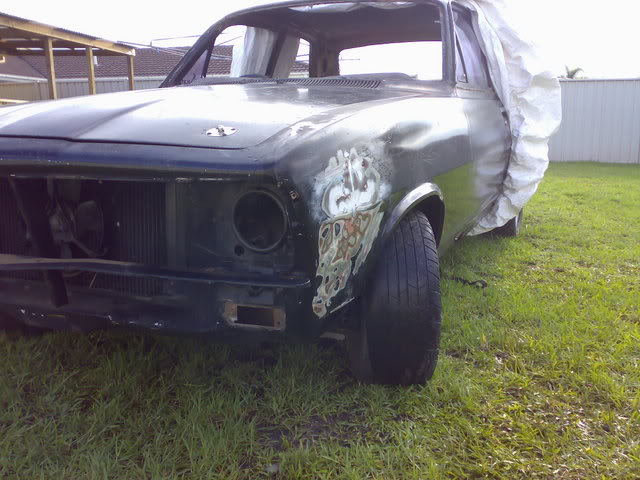
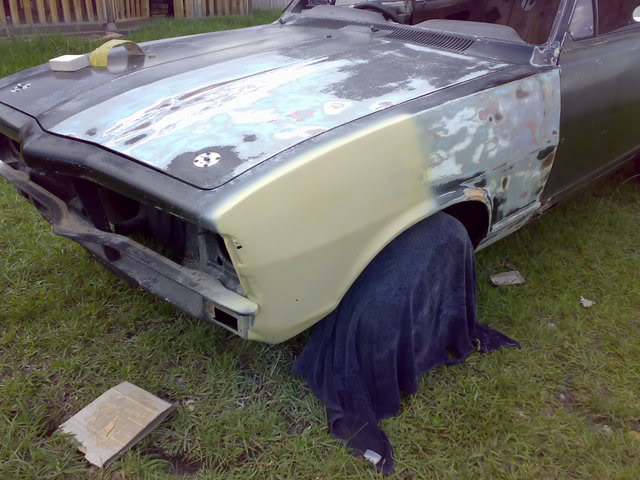
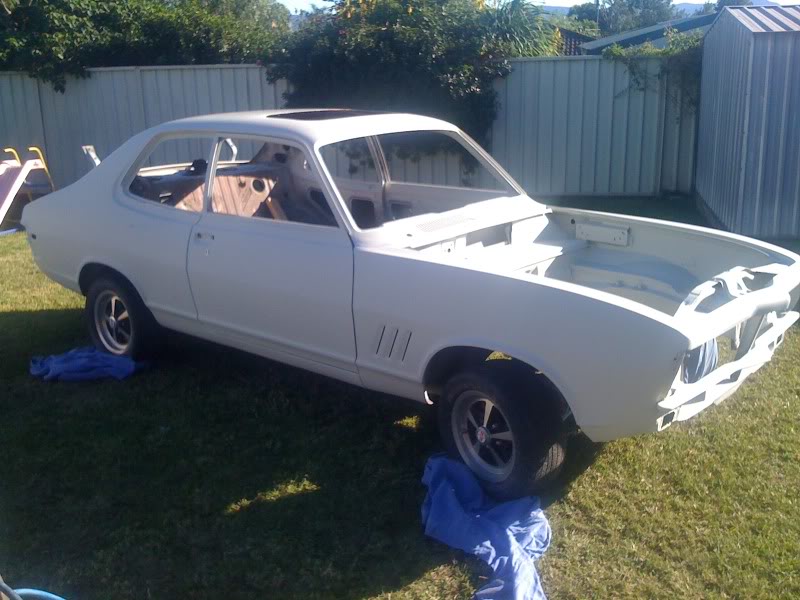
Here it is a couple days later after being towed home - doesn't look too bad, but it is
Posted Image

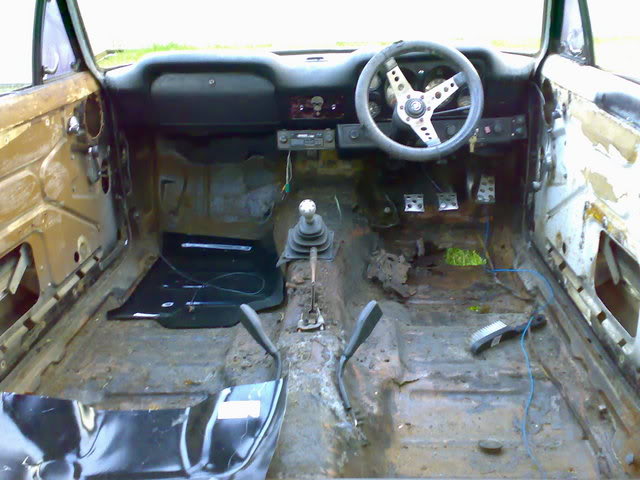
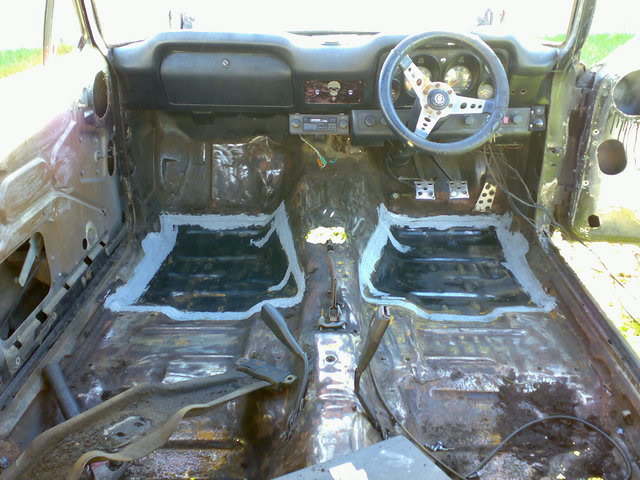
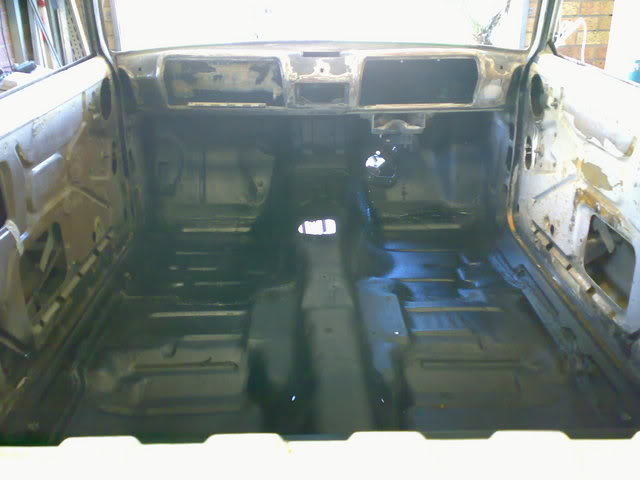
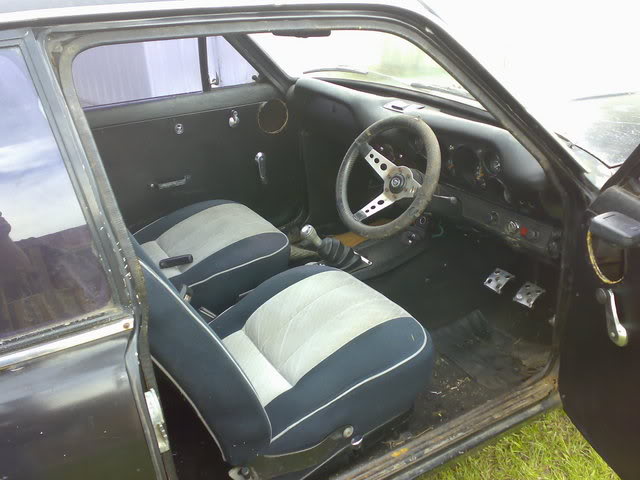
The interior which I didn't plan on keeping, but thought someone else might like it.
Turns out the door trims are a bit dodgy and screwed on, and the back seat is kinda screwed in too. So, I'll probably have to buy some new door trims and rear seat for my 'complete' LC, instead of just getting the existing ones retrimmed.
https://cache.gmh-to...theinterior.jpg

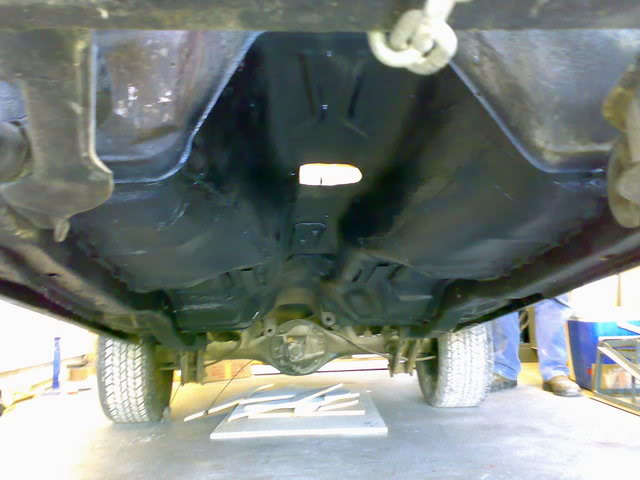
Ass shot 'Flaunt it baby!' hehe
https://cache.gmh-to...ord/theback.jpg

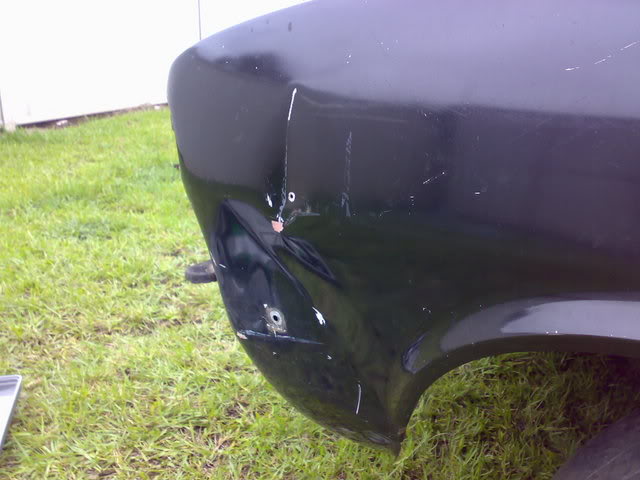
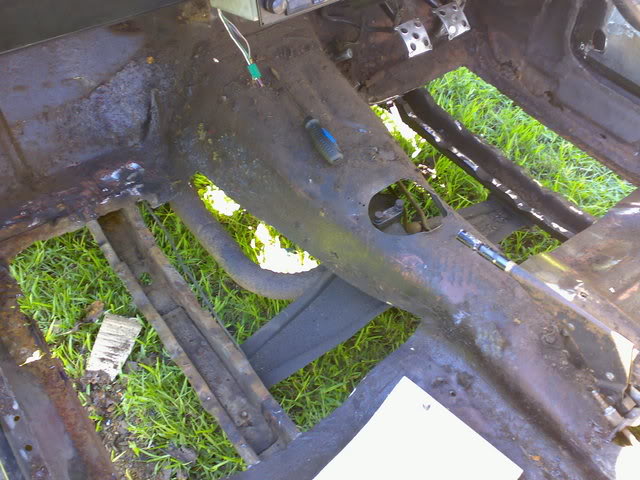
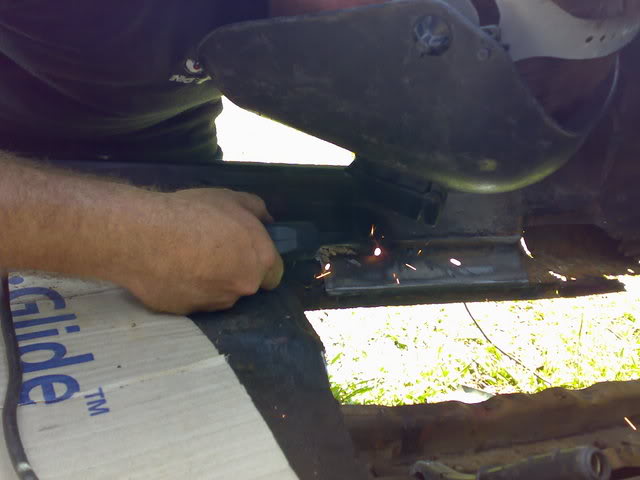
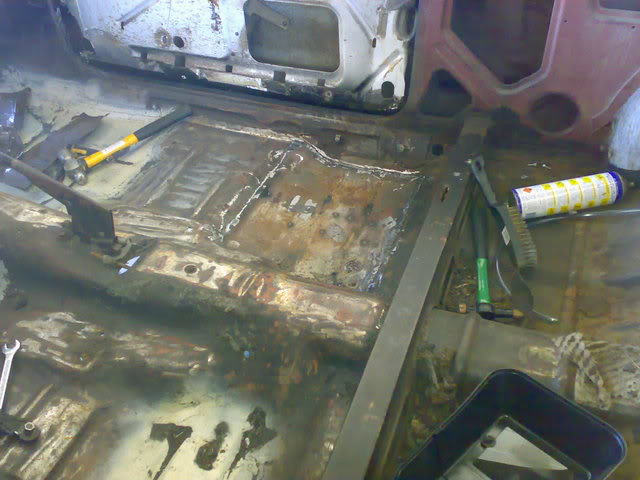
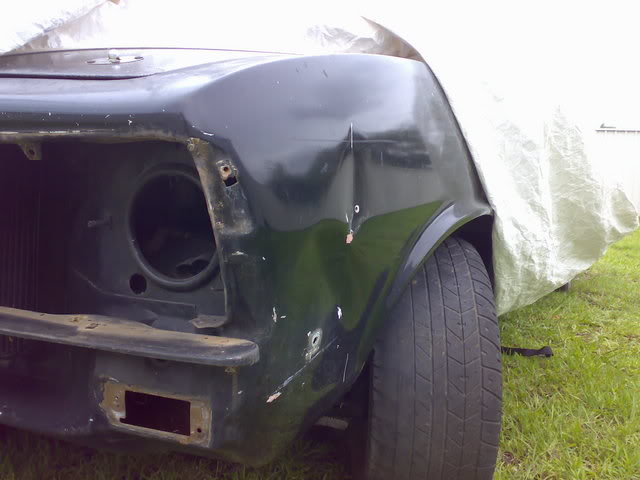
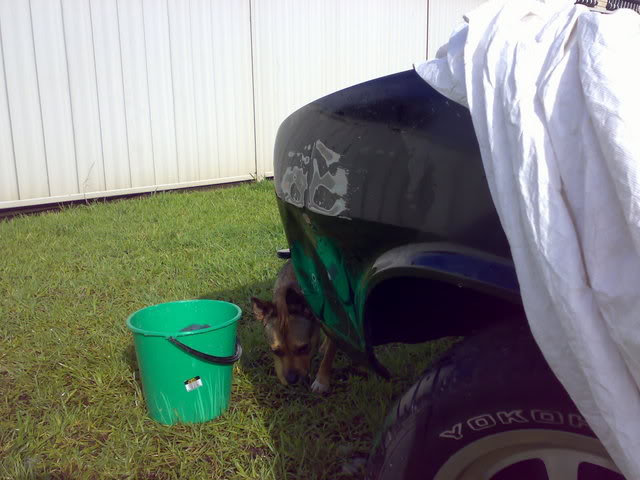
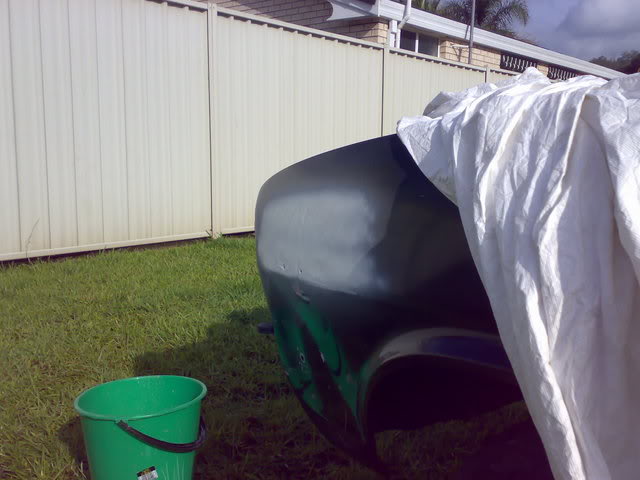
Here's a couple of shots of some of the work I had ahead of me.

Nice dent... passenger side was dented, drivers was repaired with bog falling out
Posted Image

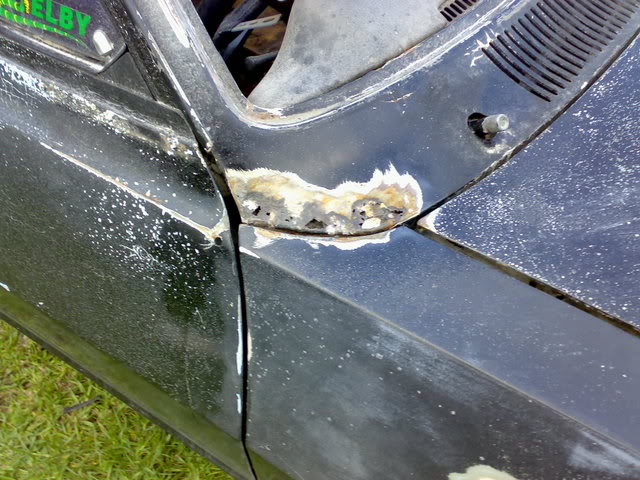
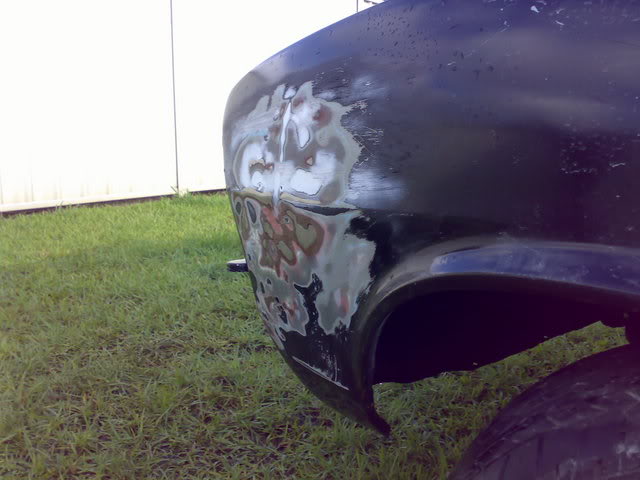
Both sides of the front cowel had been bogged and looked fine, but when I sanded a bit, I discovered the rust - look at that paint work, ouch.
Posted Image

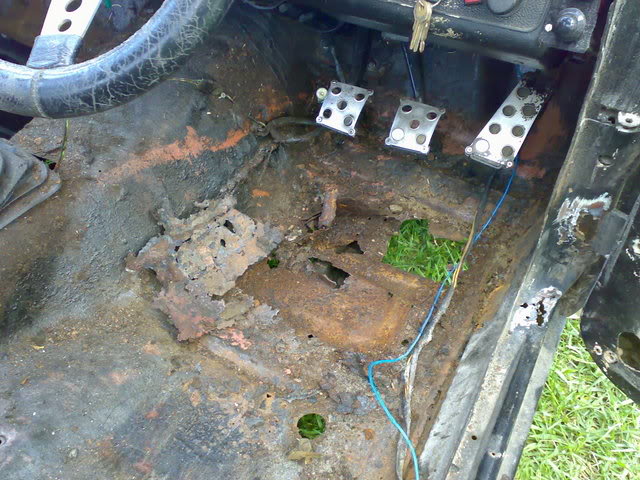
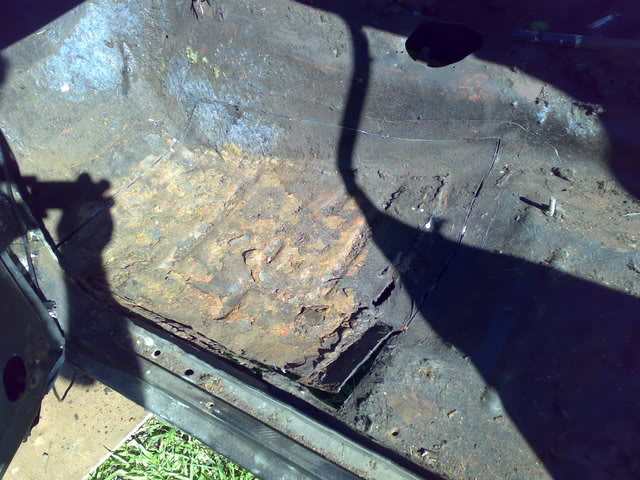
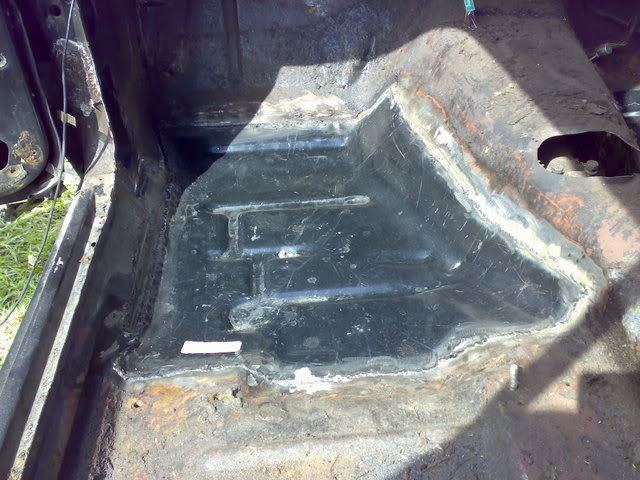
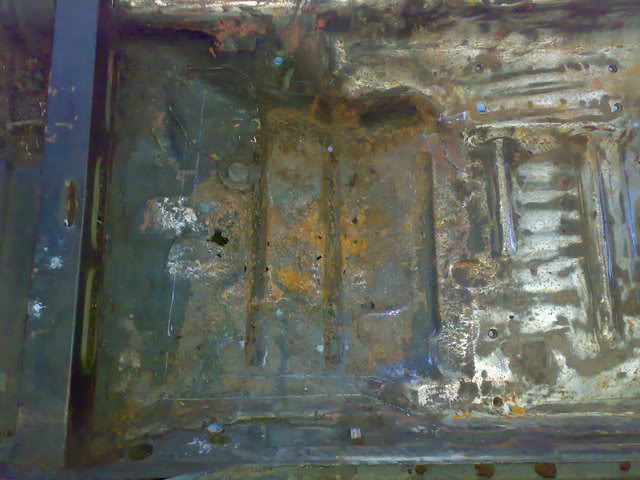
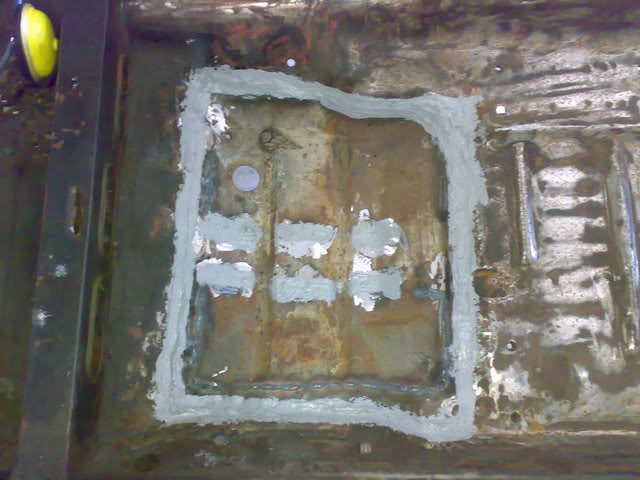
The floor is pretty awesome, we saw it was rusty when we looked at the car, but we didn't realise it had been repaired once before! Both drivers and passenger side had a new floor pan welded over the top of a rusty floor! And... the 'new' floorpans were now even rustier than the ones underneath!
Must have had something to do with dodgy siliconed up sunroof
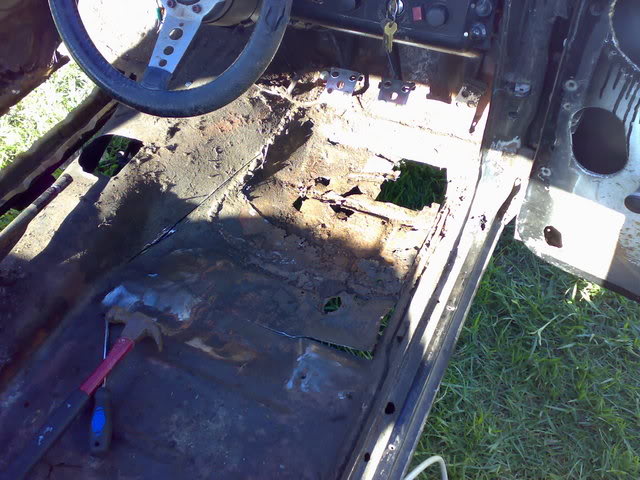
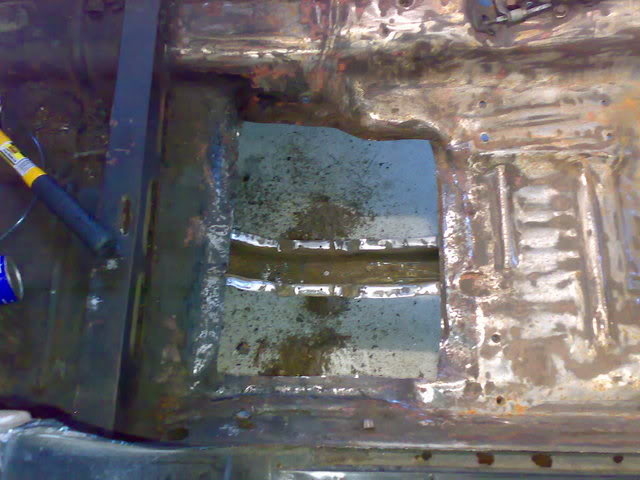
It also needed a rear drivers floorpan.
Posted Image

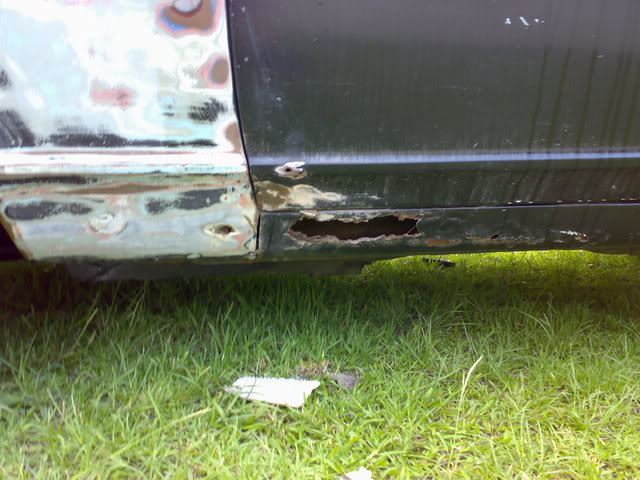
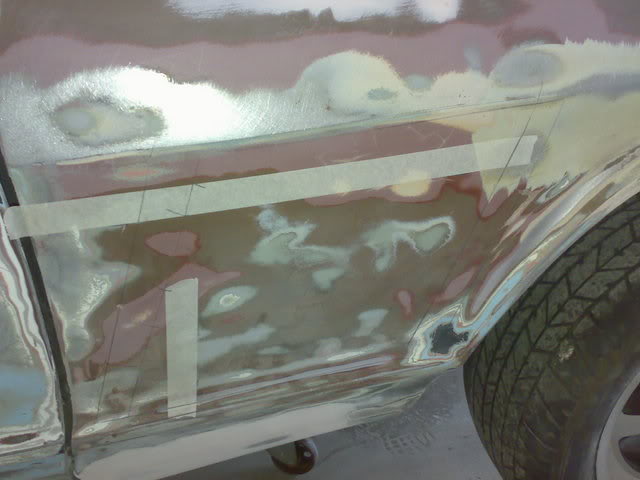
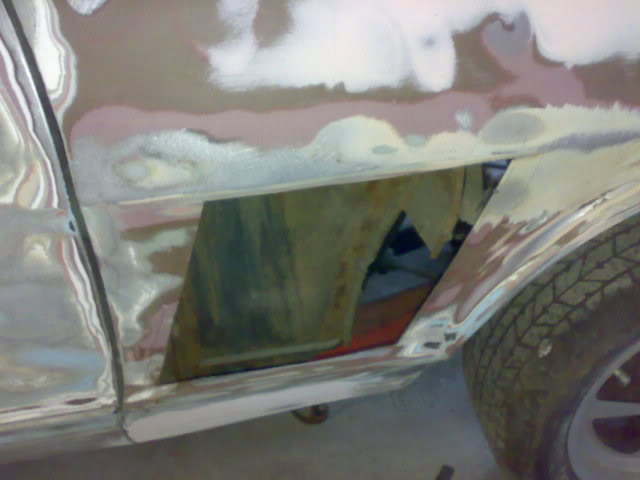
Both sills needed replacing, along with the bottom of both front guards. Passenger side was worse than the drivers side.
Posted Image

The paint is all cracked and lifting and well and truly #@$^%&. And there's also about 4 different paint jobs to dig through.

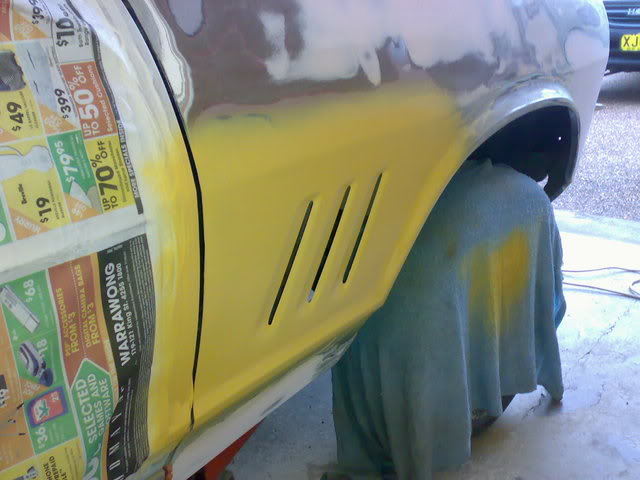
So... that's what I started with. I've made some progress on it, I'll upload some more pics and add another post maybe later tonight or tomorrow. But you can just sit there and absorb those ones for now

#2 _TJ253_

_TJ253_
  • Guests

Posted 13 June 2007 - 04:33 PM

damn some of that looks Nasty mate but its good u have decided to save it

#3 Bart

Bart

    Shit a brick

  • Members
  • PipPipPipPipPipPip
  • 2,559 posts
  • Location:Sydney
  • Car:LJ Torana
  • Joined: 20-November 05

Posted 13 June 2007 - 07:31 PM

we have the technology to fix it.
and the parts
keep going mate one step at a time :spoton:

#4 Bart

Bart

    Shit a brick

  • Members
  • PipPipPipPipPipPip
  • 2,559 posts
  • Location:Sydney
  • Car:LJ Torana
  • Joined: 20-November 05

Posted 13 June 2007 - 07:33 PM

looks like youl have to cut/remove the spot welds on the front door pillar, that front door pillar looks like it needs attention.
Dont stress it can be done :spoton:

#5 _Bedford_

_Bedford_
  • Guests

Posted 13 June 2007 - 10:52 PM

Bart, I've seen what you've done, this will pale in comparison to your build :)

But it will be tidy :)

#6 _Bedford_

_Bedford_
  • Guests

Posted 14 June 2007 - 07:32 PM

The Floor

So, the floor was really rusty.
The two front floor pans were rusted, and then had extra floorpans welded directly over the top. Crazy!

Anyway.... I ordered some replacement front floor pans, had my brother come around, and this is where we were at.
Posted Image

This is the passenger side floor pan... the 'new' top one wasn't too rusty, but there was one underneath that was #@$^%&, so out they both come, and a new one will go in. This is cut out, and actually only had two spot welds holding it in.
Posted Image

Another shot of that super flintstones style drivers floor... gotta love it! All cut out, ready to be seperated from the chassis. This side was much harder, had a heap of spot welds and the floor was rusty, so I couldn't see where to drill them out.
Posted Image

Is this how a rust free floor is supposed to look? :)
Posted Image

Once we'd cut out both floors, we found we needed to do repairs on both sides of the car before the replacement floorpans could go in. That's my brother on welding duty... couldn't do it without him!
Posted Image

After a couple of repairs, and welding a new floorpan in, this was how she looked.
Posted Image

Fast forward.... both sides are cut out, repairs done, welds ground back a little. I probably went a bit overboard with the seam sealer, but I wanted to make sure no water would get in anywhere :)
Posted Image

We chased a few holes on the passenger rear floor, so that's all good.
I needed to source a replacement pan for the drivers rear, as that was too far gone. I ended up getting one off this forum from a member named 'limo', thanks bud!

So, that's all welded in and seam sealed aswell.

The floor is now rust free :spoton:

Edited by Bedford, 14 June 2007 - 07:32 PM.


#7 _JBird_

_JBird_
  • Guests

Posted 14 June 2007 - 08:02 PM

Nice one!

Get a move on Winter is coming! Rain/Humidity/Rust!!! That's some tidy work there. Don't you just love buying old cars, more often than not, your buying someone elses problem/dodgey repairs. :cry:

#8 _Bedford_

_Bedford_
  • Guests

Posted 17 June 2007 - 08:06 PM

More of The Floor

Here's a few more pics of the floor.
The repair I did on the rear pan a couple of weeks ago, and the painting I did today.

When we had to weld underneath the floor, we lifted the whole front of the car up with an engine hoist. Then my brother got under there and did all the hard work :spoton:
Posted Image

The following is the rear floor pan in it's rusty glory, then a hole, then welded, then seam sealed.
A bit overboard on the seam sealer again :)
Posted Image

Posted Image

Posted Image

Posted Image

And then today, after I finished doing some other welding for some other repairs, which I'll post about later on, I decided to paint the floor and make it look respectable again :)
Posted Image

Posted Image

That's the most recent thing I've done, but there's still a few other repairs for you guys to catch up on. I'll upload some more pics in the next day or two and show some other things that have been done :)

#9 _Bedford_

_Bedford_
  • Guests

Posted 19 June 2007 - 05:03 PM

Front Guard Repair

It had nice dents on both sides of the front guards. The passenger side had been untouched, the drivers side had a repair a while back, and the bog had cracked, and moisture got underneath and the metal was pitted.
I don't have any pics of the drivers side repair, but I did take these ones of the passenger side.

This was how it looked to start with.
Posted Image

Posted Image

I started on it with a hammer and dolly (never used one before, I'm just winging it here!)
To make it more noticable for me as to how it was coming along, I sanded it a bit to check out how low the low spot looked.
Posted Image

After some more banging, I threw a bit of paint on there to give me a better idea again.
Posted Image

Then I started on the bottom dent, using the same process.
Posted Image

Starting to look like the original shape!
Posted Image

After I got it as close as I could I sanded it back a bit and then put a wipe of 'contour restorer' over it, gave it a sand, and the result looked ok. I chucked some paint on it cause I can see the lines better on it that way.
Posted Image

It looked good, but when you ran your hand along you could feel a low spot, where it was a bit flat and shapeless on the top. So since then it's had another wipe of 'contour restorer', and it feels pretty close now :)

#10 _lctorana71_

_lctorana71_
  • Guests

Posted 19 June 2007 - 10:12 PM

hey looks like good so far. any ideas for engine/driveline??

#11 _65EAT_

_65EAT_
  • Guests

Posted 20 June 2007 - 12:24 PM

Looks great so far!! The rust pics bring back memories...or is that nightmares of when we went searching for rust on mine :tease: My floor was fine...but the rest!! Good luck with it, what are your plans?

#12 _Bedford_

_Bedford_
  • Guests

Posted 20 June 2007 - 06:44 PM

The plans are a 350 Chev, T700, 9 inch, HQ brakes, chassis kit. Maybe some nice tan coloured trim.
Will probably throw some 15" Draglites on it. Not too sure if I'll tub it yet... I'm 80% sure I won't.
Not too sure of colour yet.

:)

#13 _Bedford_

_Bedford_
  • Guests

Posted 26 June 2007 - 06:25 PM

mmm... flutes...

Now it's looking like a torana!


My flutes finally arrived after about 3 weeks or more.
I've got other pics of different stuff I've already done, but this makes it look like a real torana, so I'll post these first :)

I started on it yesterday after work, and finished today after work.

Before Shot. Was marking out where to cut. Made a mistake, that's why there's so many lines. Good thing it's me cutting it hey... :) (edit- maybe I should name the car 'Neapolitan' ;))
Posted Image

That's a big hole....
Posted Image

We've all seen welding, bogging and sanding before, so we'll skip to this one :)
Posted Image

mmmm.... sexy.......

Edited by Bedford, 26 June 2007 - 06:30 PM.


#14 smeer

smeer

    Forum Fixture

  • Members
  • PipPipPipPipPip
  • 1,526 posts
  • Location:Adelaide
  • Car:1970 LC 4-door
  • Joined: 07-November 05

Posted 26 June 2007 - 07:18 PM

nice man.. keep at it.
the blogging is nice to read.

#15 _big_als_army_

_big_als_army_
  • Guests

Posted 29 June 2007 - 08:21 PM

I'd consider eating my dinner off your floor after those quality repairs. Can't wait to see the V8 gear going in. Are you going to use one of the CRS steering relocation kits or just 3 x LH/LX unis?

#16 _Bedford_

_Bedford_
  • Guests

Posted 06 December 2007 - 04:43 PM

Hey all.

An update on the wreck....

I went on a holiday to NZ a month after my last post, so not much got done in the lead up to that.

Also I found out I got accepted into the NSW Police, so the studying has been taking up a lot of my time.

Then, I stacked my motorbike (R6) and so the Torana took a back seat while I procrastinated about getting that fixed.

Anyway.... xmas holidays are coming up. The bike will be fixed by this weekend :D. The Torana is in primer! I can see how much extra work it needs :cry:.

I plan on having it in colour before I go back to work next year, and I plan on deciding on all the other details regarding the conversion ;)

Time to get this thing finished!!

#17 lcgtrrob

lcgtrrob

    Forum Member

  • Members
  • PipPipPip
  • 207 posts
  • Name:Rob
  • Location:wollongong
  • Joined: 29-December 06

Posted 06 December 2007 - 07:32 PM

good things take time mate,it's good to see people who appreciate old cars joining the police force.

#18 _Bedford_

_Bedford_
  • Guests

Posted 08 December 2007 - 04:25 PM

So....

This is how the car looks at the moment.
Most of the lines are good now. Needs a lot of little things fixed, assorted imperfections and little dents that show just how hard a life the poor things had.

Posted Image

Check out how huge this 17" commodore wheel looks, hehe :)
Posted Image

I think I'm nearing the end of my patience and ability here though.
I might spend another day on it, then send it off to a panel beater for a once over and the actual spraying of the colour. Still undecided...

#19 _adamlcgtr383blownchev_

_adamlcgtr383blownchev_
  • Guests

Posted 08 December 2007 - 10:18 PM

Great work mate. I get my GTR back from paint soon. You got me excited!!!!! :spoton: :spoton: :spoton: :tease:

#20 _studricho_

_studricho_
  • Guests

Posted 09 December 2007 - 08:20 PM

What product did you use to paint the floor, it looks great!

#21 _Bedford_

_Bedford_
  • Guests

Posted 11 December 2007 - 07:52 PM

It's just underbody deadener or something.
I'll get the exact name for you ;)

#22 _Bedford_

_Bedford_
  • Guests

Posted 06 May 2010 - 08:41 PM

Update

So, almost two and a half years since my last update... ummm.... loooooooooong time.

Been busy with, umm, stuff.

Got a new job, yep, I now pose as an old lady in photos
Posted Image

Became a dad
Posted Image

Sold a washing machine
Posted Image

Bought a kitchen
Posted Image

And in the meantime managed to do sweet f*$k all on the Torana.
I lost the motivation and the desire to fix up the Torana. In the back of my mind I wanted a race car (circuit race car) and to be honest, the Torana shell was a bit shit. Too many repairs, not enough talent.

Anyway... had a few weeks off work, so boredom caused me to drag the Torana out of the shed. Without exposing you to anymore back story, I'll just say it had a run in with mother nature a little while ago, and as a result needed a 'little extra work'.

So after a 'little extra work' I decided I'd paint it Lina Mint. I would have preferred a red colour, but I had zero confidence in my body work, so I thought I'd go for a lightish colour which wouldn't exmphasize my lack of talent as far as sheet metal is concerned.

I went to the local paint supplier... no Lina Mint 2k. They ended up mixing some up in acrylic and matching it for me.

Here we are, just before paint.
Posted Image

And just after paint
Posted Image

And the other side
Posted Image

I DON'T LIKE THE COLOUR.
.
.
.
.

ummmm

SHIT.

I think it's too dark for Lina Mint. It's too bright... I was expecting something a bit more pale. The photos don't demonstrate just how green this green is.

Oh well, it's progress at least! The wife likes the colour, she originally suggested orange. So to have her approve the green I don't like is a little validating for me.

Stay tuned for more!

Edited by Bedford, 06 May 2010 - 08:44 PM.


#23 _dirtbag_

_dirtbag_
  • Guests

Posted 07 May 2010 - 07:39 AM

hahaha. Oh Bedford, the dilemmas we face when building these rotten cars : )

I don't mind the colour actually, but you forgot to fill the big hole in the roof. If you put the blackouts on it, it might make it look a little less green??

I think if the missus likes the colour then she wont be upset when you stick a 383 stroker and T56 in there : ) I think it needs it. Well, I think every car needs it : )


p.s. your baby is beautiful. Congrats.

#24 76lxhatch

76lxhatch

    That was easy!

  • Members
  • PipPipPipPipPipPipPip
  • 7,227 posts
  • Location:Unzud
  • Car:SS
  • Joined: 04-August 08
Garage View Garage

Posted 07 May 2010 - 07:45 AM

I can see what you mean, but before you get too worried about the colour try adding some contrast. Sit the bumpers, grill, tail lights in place. Play with some black contrast using some tape or something. You might find its not nearly so bad when its not all the same solid colour.

Haven't seen this thread before, looks like you've done a good job bringing it back and I'm sure it will be great to have it driving again! :burnout:

#25 Heath

Heath

    I like cars.

  • Administrators
  • PipPipPipPipPipPipPip
  • 18,403 posts
  • Name:Heath
  • Location:Eastern Suburbs, Melbourne
  • Car:Heavily Modified UC Sunbird Hatchback
  • Joined: 07-November 05
Garage View Garage

Posted 07 May 2010 - 10:28 AM

Photos don't look like they show the colour at all.

I hate reading things like that... very disappointing. But there is always a chance that it will really 'grow' on you. When I bought my car I thought bright green was an awful colour, now I like every bright colour pretty much hahaha Toranas should be nice and bright, and Lina Mint is tasty I reckon.

With some black around the windows, maybe some black on the sills or a GTR style offset twin stripe in black, I think it would look incredible. It's hard to visualize a car's colour well when it isn't assembled so there is no contrast.

You can always paint it another colour if you want to...


0 user(s) are reading this topic

0 members, 0 guests, 0 anonymous users